Tag Archives: Holiday

Happy Holidays: Free Printables & Last Minute DIY Gifts

22 Dec

Spending some extended time with the little people in your life this holiday season? We put together another assortment of seasonal activities that you can easily print, prep, and have ready for when you need to entertain them! Some of the activities can serve as last-minute gifts for an acquaintance, friend, neighbor, babysitter, or someone who makes your life a tad easier and more joyful. Have fun!

Farm Table Kids' Crafts

Printables:

Virginia apples

Last Minute DIY Activities & Gifts:

As The Farm Table winds down this year, we want to say how much we’ve appreciated our members, readers, and bloggers for their support during our second season, and our very first year blogging . We are especially thankful to the wonderful farmers who have grown such amazing food, and introduced many of us to some new seasonal pleasures (can you say watermelon radish?!).

We look forward to the 2013 season, and many exciting things to come in the New Year.

Until then: Eat well. Rest well. Be Well.

A Progressive Party, Rosedale Style

19 Dec
Spiked lemons and oranges

Vodka Spiked Lemons and Oranges

My family and I live on the North side of Richmond. Rosedale, to be exact. Our block is a modest neighborhood with wonderful neighbors who help take care of one another, and it seems that one household after another is having a baby (maybe it’s the water?).

We have a lot of young children in our neighborhood. Kids naturally want to play with other kids, and that forces us sometimes anti-social adults to interact with one another. With the neighborhood tots at the center of it all, we have formed a tight-knit community to be proud of. We look after each other’s children, celebrate their birthdays, check in on each other’s pets, and borrow a cup of sugar from each other from time to time.

I think that is something to celebrate. 

A couple of weekends ago we held our 2nd-annual progressive party. If you are not familiar with a traditional progressive party, you move from one house to the next, progressing through each course of a meal — appetizers, main course, dessert — you get the picture.

Instead of progressing through each course of a meal, we asked our hosts to pair an appetizer with a drink, and then we moved from one house to the next. The destination? A backyard campfire with desserts , and drinks.

Progressive Party

Neighbors who were not interested in hosting, brought something to share at the end, potluck style. Some of us co-hosted, and we spent about 30-45 minutes at each house. The more houses involved, the less time you generally spend at each house, but you make it what you want, and flexibility is key. In the end, it all works out.

I thought you might enjoy a recipe one of our neighbors came up with, along with links to some of the many other delicious food and drinks we enjoyed together, if not for a future progressive party, maybe for your New Year’s Eve celebrations.

Rosedale’s Mini-Tostadas

Ingredients:

  • Meat: duck, chicken or pork all work well — you get to decide.
  • Spicy Red Mole Sauce (makes approx 3 quarts): 4 tomatoes, 1 jalapeño pepper, 1 yellow onion, chopped, 1 red bell pepper, 1/2 Habanero pepper (leave Habanero out for a milder sauce). 1 cup toasted pumpkin seeds, 2 tbsp. white sesame seeds, 1 tbsp chopped garlic, 1 quart chicken or veggie stock, 1 tbsp ground cumin, 1 star anise pod, 1tbsp chile powder, 2 bay leaves, 1/2 tsp cinnamon, 1/2 bunch cilantro, sour cream, 1 wheel Mexican chocolate.
  • Round tostadas (small round tortilla chips work perfectly)
  • Sour Cream (light works well)
  • Cilantro, pulled from the stem

Directions:

  • Roast meat and the pull into bite sized pieces after it is cooked.
  • To make the Spicy Red Mole Sauce: Chop peppers, onion, tomatoes. Roast in oven at 375 until they begin to brown, about 1/2 hour. Mix all other ingredients together with stock, let simmer. Add roasted veggies. Simmer until chocolate is dissolved. Purée mixture. Add 1/2 bunch cilantro, chopped. Add cooked pulled meat into sauce.
  • Lay out round tostadas, place small amount of sauce covered meat on each.
  • Top with a small dollop of sour cream and 1 cilantro leaf.

Here are links to some of the other tasty treats we enjoyed:

Want to arrange your own progressive party, or celebrate the New Year? Do it. It’s easy and oh so worth it to celebrate the good people in your life.

Oh, and The Farm Table wants you to be safe, so if you have to travel, please designate a driver and come up with a special non-alcoholic beverage for your teetotaling guest. 

Happy Holidays!

Red Wine-Braised Leeks and Mushrooms

28 Nov

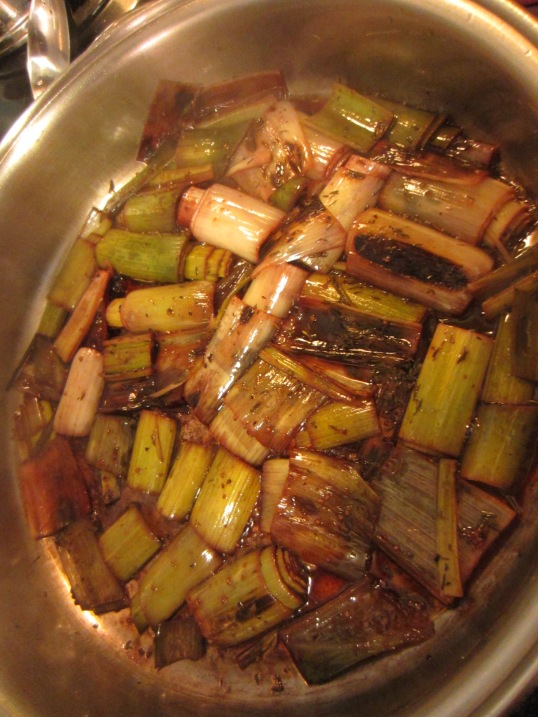
As promised, I tried out one of Terry Hope Romero’s recipes from Vegan Eats World as part of The Farm Table’s cook book review and blog give away. This dish was a wonderful addition to our Thanksgiving meal last week, and topped our mashed potatoes, which we usually don with butter or gravy. What a fancy  and welcome upgrade!

Red Wine-Braised Leeks and Mushrooms

Ingredients:

  • 1 pound leeks, preferably thinner leeks no wider than 2 inches in diameter
  • 10 oz cremini mushrooms, brushed clean and tough ends of stems sliced off
  • 3 Tbs of olive oil
  • 2 cups dry red wine
  • 1 tsp dried marjoram
  • 1/2 tsp salt, plus additional for sprinkling
  • 4 sprigs fresh thyme or 1/2 tsp dried thyme
  • 2 Tbs non-hydrogenated vegan margarine
  • A few twists of freshly ground pepper

Directions:

Trim away most of the green stalks on the leeks, leaving about an inch near the white part. Slice away the tip of root end, and slice each leek in half lengthwise.  Firmly hold the leek so that it doesn’t fall apart, and rinse under cool running water to remove any grit or dirt. Place leeks on a cutting board and slice each piece into sections about 2 1/2 inches long — hold the pieces together to prevent the leaves from separating too much. If the leeks fall apart while cooking, don’t worry, but for the prettiest presentation try to keep them together.

Slice the mushrooms into quarters. Over medium-high heat, sear the mushrooms in 1 Tbs of olive oil. Fry the mushrooms, stirring occasionally, until both sides are browned and mushrooms look juicy  (about 4 minutes). Remove from the pan and transfer to an over-proof dish. Sprinkle the mushrooms with a pinch of sea salt, cover with foil, and put in an oven set at 250 degrees to keep warm.

Heat the remaining olive oil and place the leeks cut side down in the oil. Brown the leeks for 2 to 3 minutes, carefully lifting them up to check and see if the undersides are seared and the edges of the leaves are browned. Pour the wine, sprinkle with marjoram and salt, and tuck the thyme sprigs into the wine. Increase the heat and bring the wine to an active simmer and cover the pan. Reduce the heat to low and simmer for 10 minutes.

If serving on top of white bean puree, potatoes, or pasta, mound the individual servings (about 1 cup) of hot puree in serving dishes. Divide the mushrooms on top of the servings of puree. Uncover the pan and using tongs, carefully lift the leeks and arrange on top of mushrooms. Increase the heat to medium-high and bring the juices in the pan to a rapid simmer for 2 minutes, stirring occasionally. Reduce the heat to low and swirl the margarine into the juices. Use a wire whisk to continuously stir the sauce until smooth and lightly thickened. Drizzle a little bit of the sauce over each serving of leeks and mushrooms and serve immediately.

From the book Vegan Eats World by Terry Hope Romero.  Excerpted by arrangement with Da Capo Lifelong, a member of the Perseus Books Group. Copyright (c) 2012.www.dacapopresscookbooks.com

This dish was easy to make, delicious, and we were able to used left-over wine that was just a tad past its prime — perfect for this recipe. I encourage you to consider making it for your next holiday meal, or even better, add it to your meal plan this week. With Country Fresh Cremini Mushrooms coming in your Farm Table Garden Box this week, there is no reason not to.

I have been very pleased with the recipes I’ve tried from Vegan Eats World and Viva Vegan! over the past few weeks, and would like to thank Terry Hope Romero and Da Capo Press for allowing me to give vegan cuisine a try. I will definitely add recipes from both books to our meal rotation.

If you want to try out vegan cooking yourself, you have until 9:00pm EST tonight (11/28/12) to enter our blog give away. Details are HERE.

Sweet Potato-Chipotle Bisque

24 Nov

I decided to try my hand at Terry Hope Romero’s vegan and gluten-free Sweet Potato-Chipotle Bisque from Viva Vegan! as part of our blog cookbook give away. With the arrival of sweet potatoes in The Farm Table box, and a can of chipotles in adobo sauce that a friend left in my pantry, it seemed like the perfect dish to try this time of year. Served with warm tortillas or corn bread, you can make this bisque with whatever level of spicy heat you can handle.

I have not had the chance to cook with chipotles, adobo sauce, or coconut milk, so this was the perfect level of adventure given the amount of time I had to devote to making this meal, which was not a lot. The recipe calls for a nondairy, heavy cream substitute, which could be unflavored soy creamer, nut-based nondairy cream, coconut milk, or your preferred nondairy milk.

As always, take care when working with chiles, and do not rub your eyes!

I started out with 2 chipotles, but will likely add 1-2 more the next time I make this dish, just to bring the heat up a few notches. Terry’s bisque is the perfect combination of sweet, smoky, and heat, and my husband had no idea that it was sans the heavy cream — in fact, he was really surprised when I told him I made it with low-fat coconut milk.

I encourage you to try out what Terry calls a, “sophisticated Nuevo Latino-style, creamy dairy-free bisque.”

Sweet Potato-Chipotle Bisque

Ingredients:

  • 2 Tbs olive or peanut oil
  • 3 cloves garlic, minced
  • 1/2 pound yellow onion, diced
  • 1/2 tsp ground cumin
  • 1/2 tsp dried oregano or epazote, crumbled
  • 4 cups water or vegetable broth, or a combination of both
  • 1/2 pound white waxy potatoes, scrubbed, peeled, and diced into 1-inch chunks
  • 1 1/2 pounds sweet potatoes, scrubbed, peeled, and diced into 1-inch chunks
  • 1 or more canned chipotles in adobo, sliced open and seeded, plus 1 to 2 Tbs of the sauce
  • 1/4 cup heavy cream substitute
  • 1 Tbs lime juice
  • salt and freshly ground pepper
  • 1/2 cup finely chopped fresh cilantro

Directions:

  • Combine the oil and garlic in a large soup pot over medium heat, stirring occasionally, until the garlic starts to sizzle, about 30 seconds.
  • Add the onion and saute until tender and translucent, about 8 minutes.
  • Stir in the cumin and oregano. Pour in the water and add the chopped potatoes and sweet potatoes. Partially cover and bring to a rolling boil over high heat. Lower the heat to a simmer and cook for 25-30 minutes, or until both the white and sweet potatoes easily mash when pressed against the side of the pot with a wooden spoon. Remove from heat.
  • With an immersion blender, carefully puree the soup until it is very smooth and silky. If you prefer to use a blender, make sure to let the soup cool slightly first.
  • Add the chipotle and adobo sauce and puree until completely incorporated. If you are unsure about how much heat you prefer, start with just 1 chipotle and a drizzle of adobo sauce. The soup should  now have pretty little red flakes of chipotle.
  • If you prepare with a blender, return the soup to the pot and bring to a simmer over low heat.
  • Stir in the cream substitute, lime juice, salt, and pepper. Taste and adjust with more lime juice, salt, and pepper if desired.
  • Stir in the cilantro, and garnish with a swirl of Cashew Crema (recipe in cookbook), if desired, and serve hot.

From the book Viva Vegan! by Terry Hope Romero.  Excerpted by arrangement with Da Capo Lifelong, a member of the Perseus Books Group.  Copyright (c) 2010. www.dacapopresscookbooks.com

Serves 4-5 people. 45-min to prepare, most of which is inactive while potatoes cook.

I “eye-balled” the number of sweet potatoes to cook with, and ended up making a bisque that was way too thick. The recipe was easily adaptable with the addition of extra coconut milk, vegetable broth, and lemon juice, making the consistency much thinner.

I also used Farm Table cilantro that I had previously chopped, placed in two ice-cube trays (1 tsp per cube), froze in water, and stored in a gallon size freezer bag for such an occasion as this. I added two frozen cubes of cilantro which melted quickly into the bisque. It worked perfectly, but agree with Terry that fresh cilantro would be best for a more pronounced contrast in flavor.
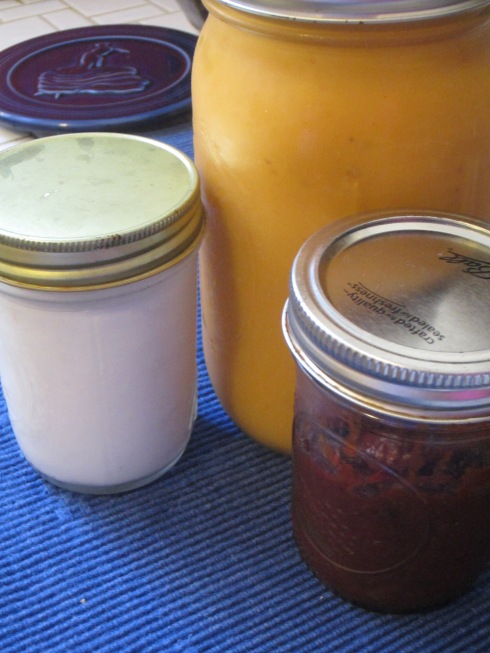
Leftover Bisque, Coconut Milk, and Chipotles are easily stored in the fridge.

Terry’s collection of Vegan Latin recipes in Viva Vegan! is impressive, and I look forward to trying out more from this cookbook, especially the Mexican Side-Street Corn, Arroz con Coco (Savory Coconut Rice), Spicy Tortilla Casserole with Roasted Poblanos, Mojito’s, and the Coconut Tres Leches Cake. If you would like to try a healthier, meat and dairy free take on classic Latin dishes, I encourage you to turn to Viva Vegan!

Don’t forget that you have until 9:00 pm EST on Wednesday, November 28, 2012 to enter to win either Viva Vegan!, or Vegan Eats World by Terry Hope Romero in our blog give away

Stay tuned for one more of Terry’s recipes from Vegan Eats World, the perfect recipe for your next holiday meal which I will reveal later this week!

Giving Thanks through Food

10 Nov

When my husband and I visited Monticello for the first time and came home with a packet of seeds from their gift shop, we never imagined the harvest that would come from this souvenir.

I mentioned several posts ago that my husband’s pride and joy from our garden this year were the Long Island Cheese Squash. He grew a little about a dozen of these beautiful pumpkins, and we have since gone on to make soup, desserts, pumpkin gnocchi, and bread with them.

We were excited about the opportunity to turn these tasty vegetables into an offering of thanks to our close neighbors who helped us with the arrival of our third child in September. Most of our family lives in the Pacific Northwest, so we relied on the kindness and support of our tight-knit neighborhood  to help us with our children while we were at the hospital bringing our now 2 month old into the world. They have since brought us dinners, desserts, homemade salsa’s, among a myriad of other thoughtful gestures. Seriously. You should move here.

How were we going to show our appreciation and gratitude? Through food, of course!

Needing a creative outlet, I decided to turn these glorious pumpkins into pies, and to bake a cake for our son’s 2nd birthday. How in the world was that supposed to happen with 3 children at home? Well, I did it over the course of 3 days, and enjoyed every minute of it. I am certain it could be done in 1-2 days, but not in this house!

I used Martha Stewart’s Brown-Sugar Pumpkin Pie recipe to treat our neighbors, and this Pumpkin Layer Cake recipe to celebrate our beautiful boy.

Day One: I halved 3 pumpkins total, scooped out the seeds, quartered them, and baked them individually, cut side up in the oven for 1-hour at 350 degrees. I placed a baking dish full of hot water on the bottom rack.

Out came this:

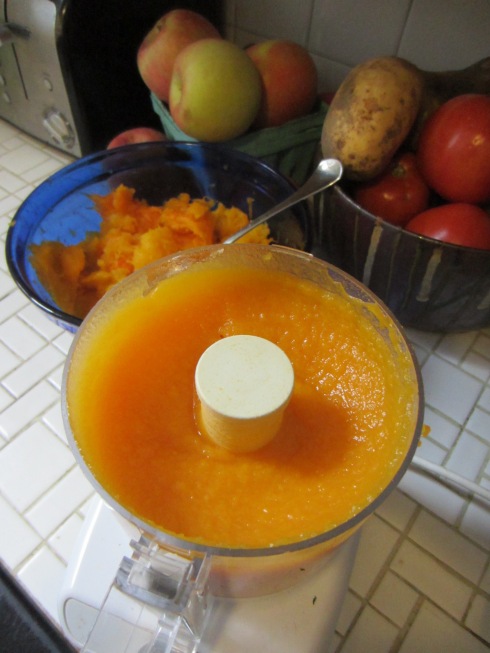
After cooling, I scooped  the pumpkin away from the skin and placed in our food processor.

I blended the squash for a few minutes and out came this  brilliant, bright orange, creamy puree. 3 pumpkins gave me approximately 13-cups of puree.

Day 2 and 3: I turned the puree into 6 desserts. One for each neighbor, and one for the birthday boy.

I had about 1 cup of puree left, and noticed after 2 days in the fridge that the puree lost its color, so recommend using the puree soon after you make it. It will keep in the fridge for 2-3 days, or you can freeze it for a couple of months.

A local friend who attended the New England Culinary Institute, and was the head chef and manager of a Bed & Breakfast in Vermont imparted this bit of knowledge along to me, “Pumpkins that come out of the can are drained of excess moisture before they are canned. This intensifies the pumpkin taste and ensures a great pie crust. When you cook a pumpkin at home, once its out of the oven and you can safely handle it (it should still be warm), you should puree it and then put it into a strainer lined with cheesecloth – this extracts some of the excess moisture in it and intensifies the flavor. This can all be done on the counter top.”

I recommend both recipes for your upcoming holiday meals, and encourage you to purchase a packet of these happy little seeds for your garden next year. You will not be disappointed, unless of course they don’t grow. In that case — try again.

I know at least one green-thumbed friend who is getting a packet of these seeds in her holiday card this year!

What sorts of things do you make to give thanks to those around you?

Here are some suggestions I found using pumpkins:

I do believe there are Pie Pumpkins available this week as an add-on.

Hmmm. How convenient!

Braised Cabbage, Thyme, and Apples

29 Jul

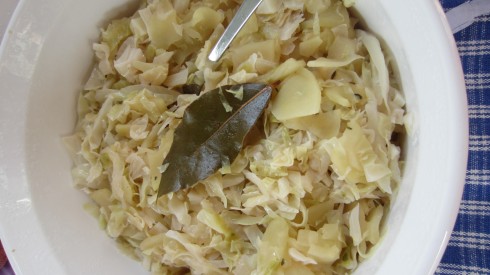
I’ll admit that I struggle to find ways to prepare cabbage, both green and red. I find my creativity stunted, and have no idea what to do with it. My husband recently harvested three heads of cabbage from our garden, forcing me to come up with something new and interesting. I was recently introduced to this recipe, and love that it can take on a different flavor and color depending on what kind of cabbage or apple you use, and is a nice accompaniment to most dishes (especially pork chops). It also went well with The Farm Table thyme that came in the Garden Box several weeks ago.

I suggest you file this one away for the holidays – you can make it in a deep pink/purple or green.

Braised Cabbage, Thyme, and Apples

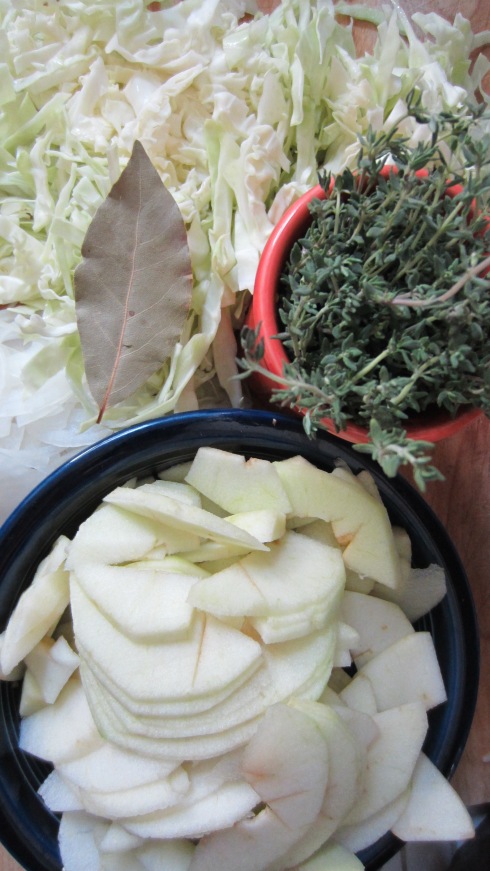
Ingredients:

  • 2 Tbs butter
  • 1 onion (preferably yellow), thinly sliced
  • Approximately 3-4 tart apples (I suggest pairing Granny Smith apples with green cabbage, and Pink Lady apples with Red Cabbage).
  • 1 tsp chopped fresh thyme
  • 1 bay leaf
  • Salt, to taste
  • 1 head green or red cabbage, cored, and thinly sliced (crosswise is best)
  • 1/2 cup or more chicken or vegetable broth

Directions:

  • Melt the butter over medium heat in a large frying pan.
  • Add the onions, apples, thyme, and bay leaf.
  • Season with salt, and cook until tender and golden (about 5-7 minutes), stirring occasionally
  • Add the cabbage, broth, and season with salt.
  • Bring to a boil.
  • Reduce the heat to medium, and cover.
  • Cook, stirring often, until the cabbage is tender, about 15-20 minutes.
  • Serve right away or cover and keep warm.

Kernel Knowledge

28 Jun

Peaches, blueberries, parades, grilled chicken, sun-kissed cheeks, lemonade, fireworks, and corn — the perfect recipe for the 4th of July.

We hope our Farm Table readers survived the nasty storm that blew through Virginia earlier this week, and that you survive the sweltering heat we expect this weekend. We have two fabulous recipes for you to try with the corn that arrived in your box, just in time for Independence Day, or to distract you from the weather. Corn is one of the most versatile foods we consume, and so much has been done throughout history to use up the cob, silk, stalks, leaves, husks, and the corn kernels. We hope you enjoy the recipes below, and look forward to sharing a recipe in a future post for a corn, cheese, and potato chowder that you can save for a rainy day.

While celebrating the purpose of our upcoming holiday, please also remember our farmers, most of whom will likely be working on the 4th, while the rest of us enjoy a festive summer day eating the food they have labored over.

Thank you, indeed.

What are your food plans for the 4th of July? Do tell!

Curt’s Grilled Corn with Zested Lime

This lip-smacking recipe comes from my brother-in-law in Oregon, and is enough for 3-4 ears of corn. This recipe is so good I could eat all 4 ears in one sitting. The only change I would make is buying more corn and doubling the recipe!

Ingredients:

  • 4 ears of corn, husked
  • 1 lime, juiced and zested
  • 1 tsp chili powder
  • 1 tsp salt, Curt insists on a good quality salt (not your everyday Morton’s)
  • Pepper, freshly ground

Directions:

  • After the ears are husked, soak them in water while you prep the remaining ingredients
  • Zest your lime, and juice it
  • Add fresh ground pepper to the lime juice
  • Add the lemon zest, chili powder, and salt to the juice
  • Stir well
  • Brush on the corn as you grill it

Excellent with an ice-cold microbrew, or for our teetotalers out there, freshly squeezed lemonade. 

Simple. Healthy. Delicious.

Black Bean & Corn Salad

Ingredients:

  • 2 cups fresh or grilled corn, cut off of the cob (approximately 4 ears of corn)
  • 1 (15 oz) can black beans, rinsed
  • 1 small red pepper
  • 1/2 red onion, diced
  • 1 lime juiced (you can substitute 1 1/2 Tbs balsamic vinegar, if you prefer it over lime juice)
  • 2-3 Tbs olive oil
  • 1 1/2 tsp ground cumin
  • 1 garlic clove minced (or 1/2 tsp garlic powder)
  • salt and pepper to taste
  • optional, but suggested: 1/2 tsp chili powder, 1-2 tsp of Tabasco sauce (or to taste)

Directions:

  • Combine corn, black beans, bell pepper, and onion in a serving bowl
  • In a separate bowl, combine lime juice, olive oil, cumin, minced garlic, salt and pepper
  • Drizzle lime juice mixture over the black bean and corn mixture and toss well
  • Chill and serve

You can amp this recipe up a few notches by adding  3 large tomatoes (diced), the tops of 3 scallions (chopped), Cotija or Feta cheese (approx 3 oz), and lay the black bean and corn mixture over a bed of greens. 

We sure hope to see you at our next Farm Table Event. You can RSVP HERE if you have not already.